Underwater photographers face unique challenges – chief among them is color loss. As you dive deeper, colors like red, orange, and yellow disappear, rendering images dull and blue-ish. Luckily, underwater camera filters can help restore these vibrantly to your shots.
Introduction
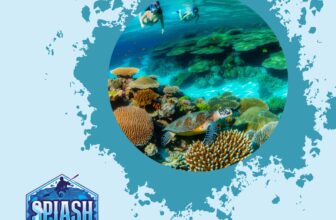
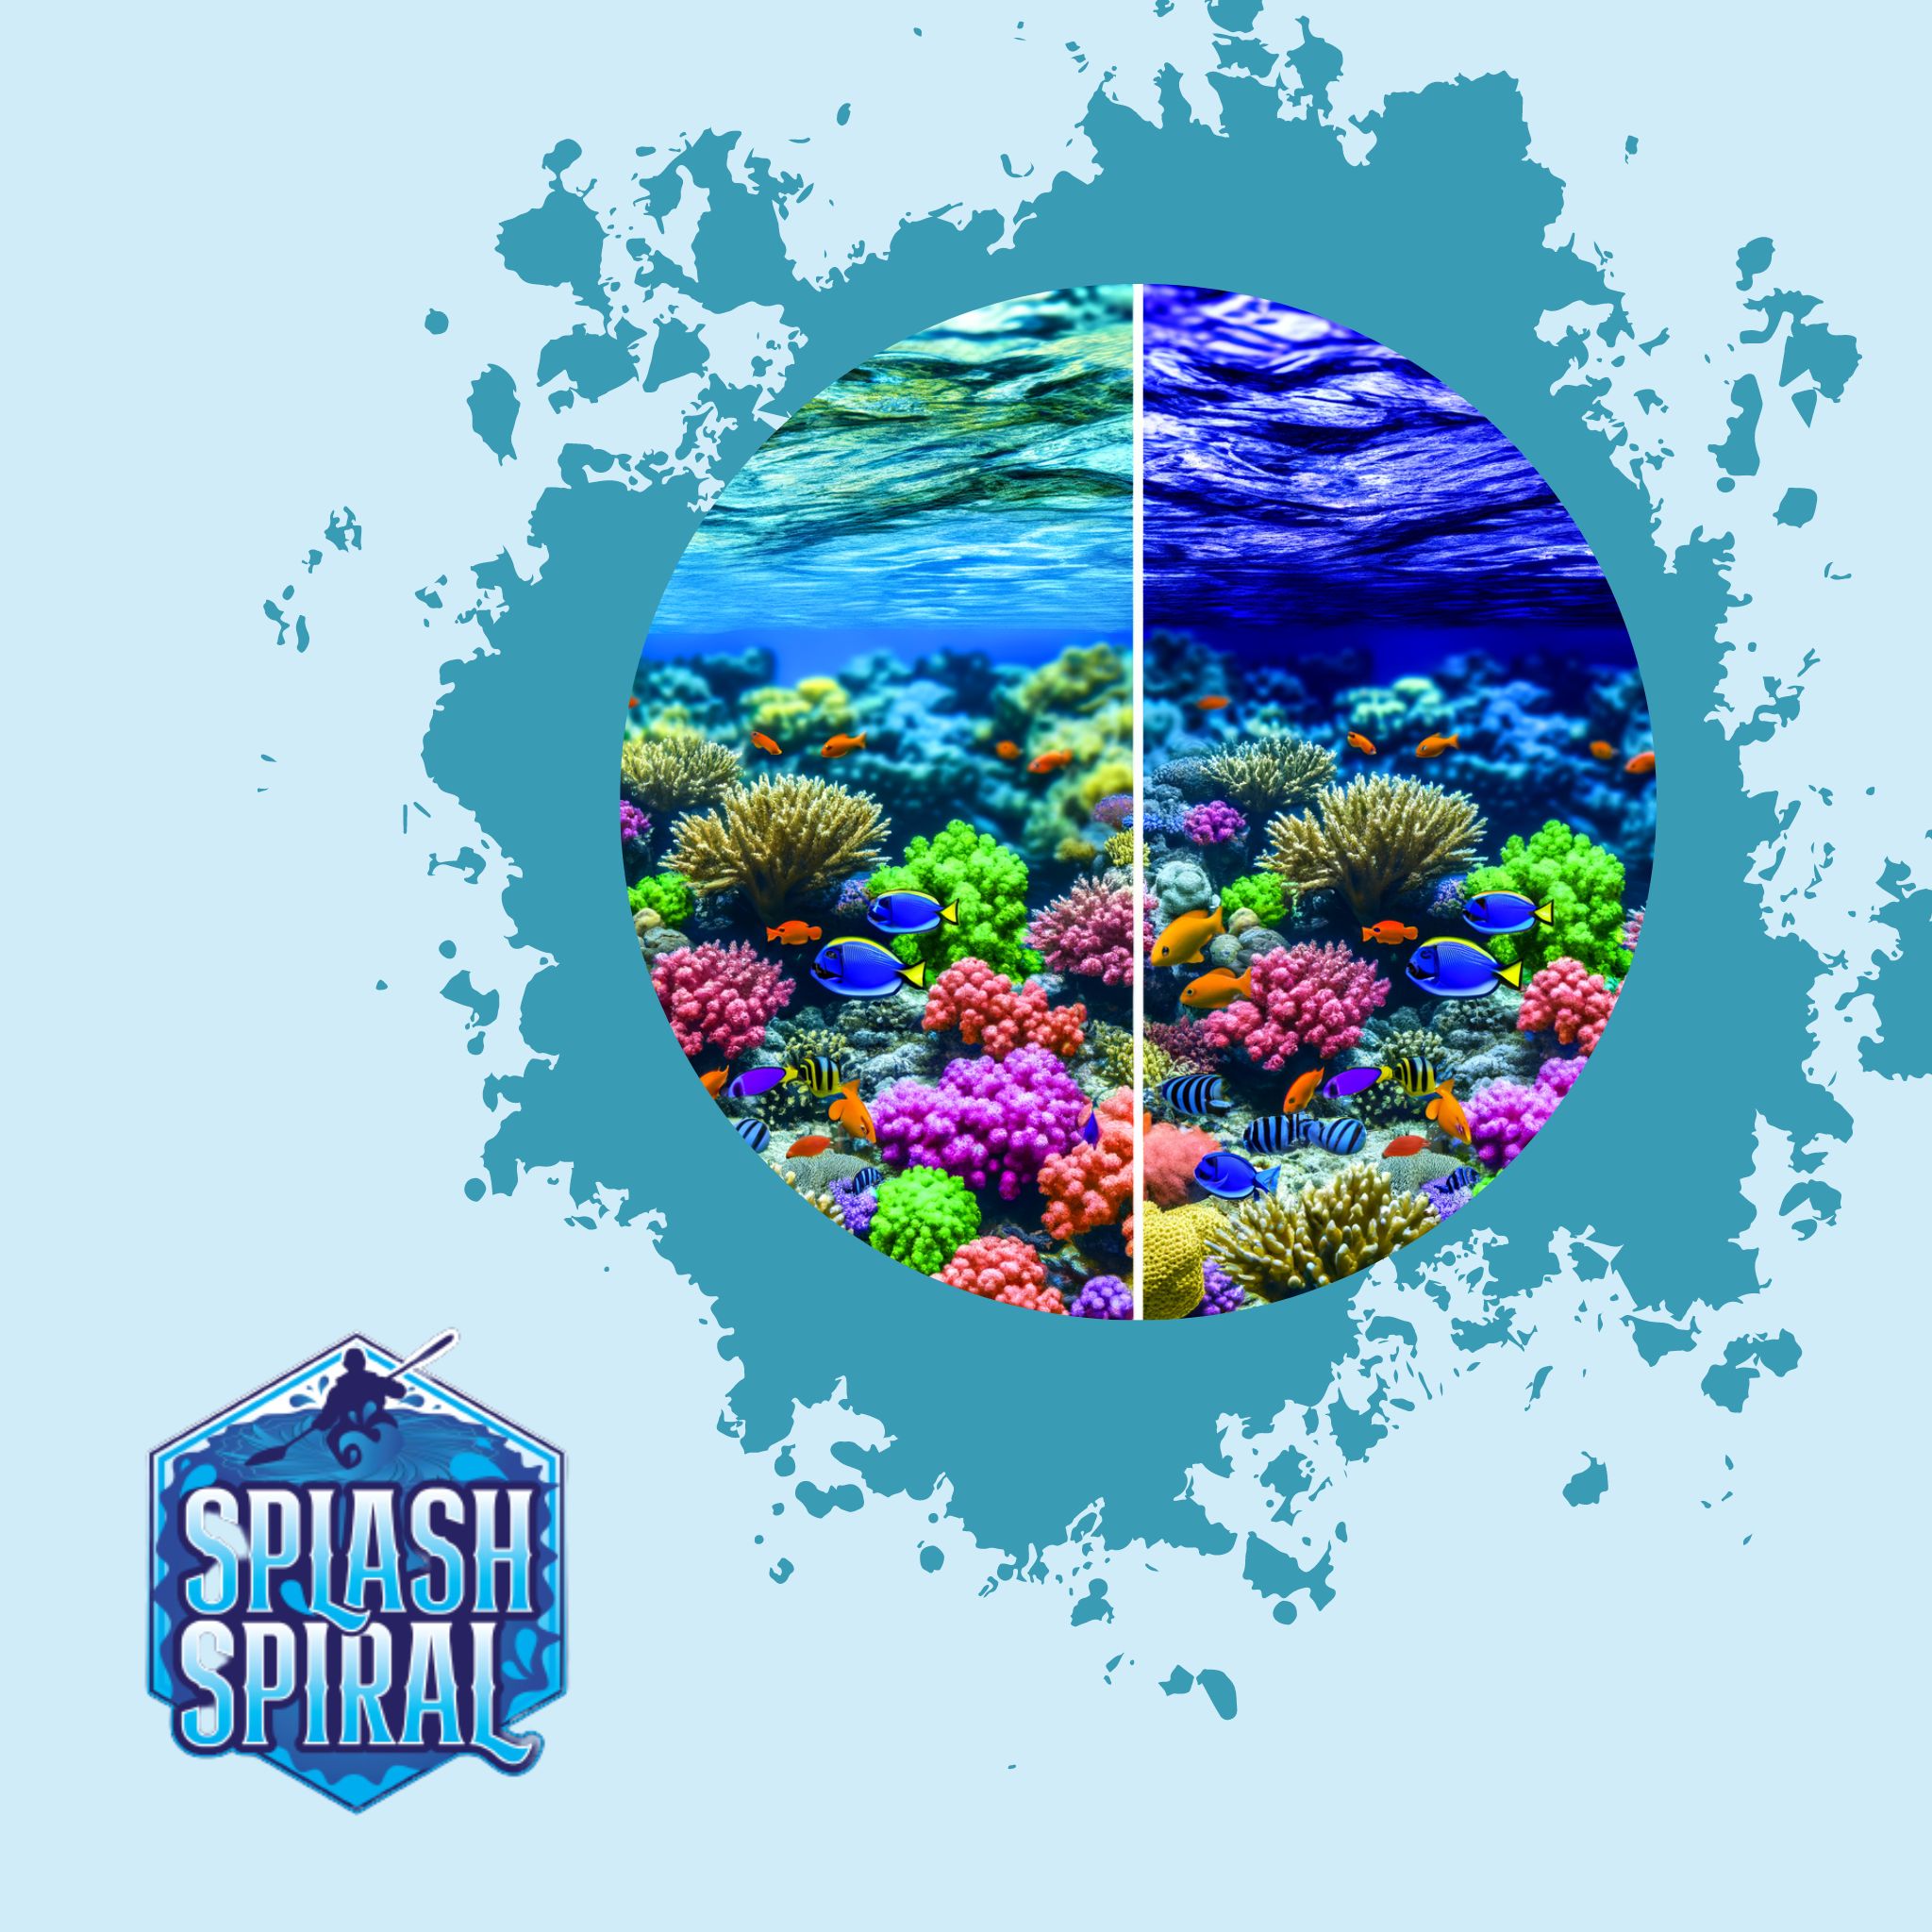
Underwater photography opens up a new world of vibrant sea life and mysterious scenery, but one big hurdle lies beneath the surface: color loss. As you venture deeper, the water absorbs colors like red, orange, and yellow, leaving your photos looking washed out and blue. This isn't just a minor issue; it can turn breathtaking underwater scenes into flat, lifeless shots.
Enter underwater camera filters. These handy tools can correct the color loss caused by water absorption, bringing back the vivid hues and adding a layer of richness to your underwater photographs. By using the right filter, you can capture the true beauty lurking beneath the waves, making every dive a colorful adventure.
Importance of Underwater Camera Filters
Underwater camera filters are a game-changer for photographers looking to capture the vividness of underwater life. The deeper you go, the more colors you lose, with reds disappearing first, followed by oranges and yellows. Without filters, your photos can end up looking uniformly blue and devoid of the dynamic colors that make underwater scenes so captivating.
So why are these filters essential? Simply, they help you reclaim the lost hues. Underwater camera filters work by compensating for the light absorption that occurs as you dive deeper. Each filter is designed to enhance the colors that get muted in particular types of water. For example, red filters are fantastic in blue-dominated waters at greater depths, as they bring back the red spectrum lost early on.
Using these filters effectively can transform your underwater photos from monotone blues to a vibrant spectrum, showcasing the underwater world in all its colorful glory. Filters can make coral reefs pop with color, highlight the dazzling array of fish species, and generally inject life into your shots. Without them, you're missing out on a huge part of what makes underwater photography so enchanting.
Filters are indispensable tools that every aspiring underwater photographer should consider. They’re not just add-ons but essential gear that can significantly elevate the quality of your underwater shots.
Types of Underwater Camera Filters
Red Filters
When you dive deeper into blue-dominated waters, you start losing the warm colors. Reds, oranges, and yellows get absorbed by the water, leaving your underwater images looking a bit cold and murky. Red filters are your best friends here. They’re designed to bring back those warm tones that are lost at depth, making your underwater scenes more vibrant and realistic.
Magenta Filters
If you're diving in lakes or coastal areas where the water tends to have a greenish hue, magenta filters are the way to go. These filters work by neutralizing the green color cast and balancing the overall color palette of your photos. This ensures that your shots don't end up looking too green and help make the colors pop, adding depth and contrast.
Yellow Filters
Night diving and fluorescent photography create their own set of challenges. In these settings, yellow filters shine. They help in amplifying the little light that's available and are particularly effective in diving conditions where you are relying on artificial light sources. With yellow filters, your night dives and fluorescence shots come alive with increased clarity and vibrancy.
Understanding these basics can help you choose the right filter for your specific diving conditions. Whether you’re diving into the blue depths, exploring green lakes, or venturing into the dark, there's a filter designed to help you capture the best colors possible.
Choosing the Right Filter for Your Dive
Selecting the proper filter for your underwater photography is crucial for capturing those vivid, lifelike colors. Here are some key considerations to guide your choice:
Dive Depth
Depth matters because light behaves differently the deeper you go. In shallow waters (up to 30 feet), sunlight can still penetrate, so red filters are often sufficient to restore warm hues. For deeper dives, darker waters necessitate different kinds of filters; magenta filters become more practical as they can combat the greenish tint that often dominates.
Water Type
Understanding the type of water you’re diving into is critical. Blue water, typically found in oceans and seas, calls for red filters to bring back the warmth of reds and oranges. On the other hand, freshwater lakes and certain coastal areas with a greenish tint will benefit more from magenta filters to neutralize the green hue and add depth to your image.
Light Conditions
The available light can significantly impact the quality of your photos. Bright, sunny days may require less aggressive color correction, whereas low-light conditions, such as overcast days or night dives, might necessitate the use of yellow filters. These can amplify natural light and make colors pop even in challenging lighting scenarios.
Specific Recommendations
- For Shallow Reef Dives: Use a red filter. These are great for bringing back the vibrant reds and oranges lost at depths between 10 to 30 feet.
- For Murky Lake Dives: Opt for a magenta filter. This will correct the excessive green and ensure your photos don’t suffer from a gloomy tint.
- For Night Dives or Fluorescent Photography: Yellow filters are your best friends. They enhance minimal available light and work well with artificial light sources to make fluorescent subjects stand out.
By carefully considering these factors—dive depth, water type, and lighting conditions—you'll be better equipped to choose the right filter, leading to more stunning and vibrant underwater photos. Happy diving!
Top Underwater Camera Filters on the Market
Backscatter FLIP Filters
If you're looking for versatility, the Backscatter FLIP Filters are a top choice. These filters offer a range of color correction options that you can easily switch between, even mid-dive. They are particularly effective in blue-dominated waters where restoring reds and oranges is crucial. The flip mechanism allows for quick adjustments, making it convenient for capturing consistent, vibrant images as lighting conditions change underwater.
SeaLife DC2000
Ease of use defines the SeaLife DC2000 filters. These are perfect for beginners who may be daunted by the technical aspects of underwater photography. The filters are straightforward to attach and are known for their robust performance in color correction. They work seamlessly with the SeaLife DC2000 camera but can also be adapted for other models, broadening their utility.
Fantasea FG16
For those in need of a durable and reliable option, the Fantasea FG16 filters stand out. Constructed with high-quality materials, they can withstand the rigors of frequent diving. The filter set offers excellent color balance, providing vibrant and accurate shades, especially in tropical waters. They are designed to fit snugly and securely, ensuring you won't lose them mid-dive.
These options cater to a range of needs and experience levels, ensuring you have the right tools to capture stunning underwater photographs full of vibrant colors. Begin your underwater photography journey with one of these top-tier filters to enhance your dive shots and bring the underwater world to life.
How to Use Underwater Camera Filters
Using underwater camera filters isn't rocket science, but getting it right can make the difference between dull and dazzling shots. Here’s a quick and straightforward guide to help you out.
Attaching Filters
First things first, let's get those filters onto your camera:
-
Check Compatibility: Ensure your filter is compatible with your camera housing. Most filters are designed to fit specific models, so double-check the packaging or manufacturer’s website.
-
Clean the Filter: A clean filter makes for a clear shot. Use a microfiber cloth to wipe away any dust or smudges.
-
Attaching Mechanism: Filters usually attach via a clip-on system, screw mount, or slide-in slot. Follow the instructions specific to your model:
- **Clip-On**: Simply clip the filter over your camera’s lens port until it securely snaps in place.
- **Screw Mount**: Twist the filter onto the lens port by turning it clockwise. Make sure it’s snug but don’t overtighten.
- **Slide-In**: Slide the filter into the designated slot, ensuring it’s fitted properly and won’t shift during your dive.
Adjusting Filters
Diving conditions can change rapidly, and so might your need for different filters. Here’s how to adjust them on the go:
-
Quick-Release Systems: Some advanced models like the Backscatter FLIP Filters come with a quick-release mechanism. With a single flip or switch, you can engage or disengage the filter. Practice this a couple of times before your dive to get the hang of it.
-
Switching Between Filters: Depending on your depth and water type, you might need to swap filters during your dive. For instance, use a red filter when you’re diving deeper than 10 feet in blue water, but switch to a magenta filter if you transition into greener waters.
- Depth marker: Keep an eye on your depth gauge. Switch filters accordingly once you surpass the 10-feet mark.
-
Light Conditions: Adjust the filter based on natural light availability:
- **Bright Midday**: Sometimes ambient light is enough, allowing you to go filter-less.
- **Low Light/Night Dives**: Consider adding a yellow filter to enhance visibility and color during low-light conditions.
That’s it! By following these simple guidelines, you’ll be well on your way to capturing underwater scenes in all their vibrant glory. Happy diving and shooting!
Enhancing Vibrancy with Photo Editing Software
So, you've got your hands on the right underwater camera filters, but you're not done yet. The role of photo editing software in underwater photography is crucial to truly make your colors pop. Even with the best filters, there’s always room for fine-tuning back on the surface.
First off, let’s talk about some popular tools. Adobe Lightroom and Photoshop are industry standards for photo editing, both rich in features and widely used among professionals. For underwater photographers specifically, there are also specialized tools like Vivid-Pix LAND & SEA SCUBA and DxO PhotoLab, which cater to underwater color correction needs.
Now, let’s dive into some basic underwater color correction tips. When you’re editing, focus on adjusting the white balance to compensate for the blue or green cast that can still linger in your photos. In Lightroom, use the eyedropper tool to select a neutral area in your photo, usually something that should be white or gray. This helps balance out the colors across the image.
Next, tweak the blues and oranges in the color mix. Boosting the reds and yellows can restore warmth, making marine life and coral appear more vibrant. Be cautious with saturation though—overdoing it can make your photo look unnatural.
Finally, don’t forget about clarity and sharpness. Water can make your shots appear a bit hazy. Gently increasing the clarity and sharpness can bring back detail and make your subjects stand out better.
Remember, filters and software work hand-in-hand. Think of them as your dynamic duo for producing stunning underwater shots. Filters get you most of the way there—editing software brings it home.
Integrating Filters into Your Editing Workflow
Using filters while shooting underwater is just the first step to achieving vibrant, lifelike images. Combining filter use with effective post-processing will take your underwater photography to the next level. Here's a streamlined workflow to help you get started.
Step 1: Import Your Photos
Start by importing your photos into your preferred editing software, such as Adobe Lightroom or Photoshop. This will allow you to catalog your shots, making it easier to select the best ones for editing.
Step 2: Initial Adjustments
Before diving into color corrections, make basic adjustments:
- Exposure: Adjust the exposure to ensure your images are neither too dark nor too bright.
- Contrast: Increase contrast to add more depth and detail to your underwater shots.
- Clarity: Use the clarity slider to enhance the finer details in your images.
Step 3: Color Corrections
Now it's time to address color balance:
- White Balance: Underwater images often have a blue or green tint. Use the white balance tool to neutralize these colors.
- HSL Adjustments: Adjust the hue, saturation, and luminance (HSL) sliders. For instance, increase the saturation of reds and oranges to bring out previously lost colors.
Step 4: Fine-Tuning
With the basic color corrections done, move on to more specific adjustments:
- Selective Color: Use selective color adjustments to target and fine-tune specific hues in your image.
- Clone and Healing Brush: Remove any unwanted particles or backscatter that might distract from the subject.
Step 5: Use Presets for Efficiency
Consider creating or downloading presets specifically designed for underwater photography. This will save you time, allowing you to apply standardized adjustments across multiple images.
Step 6: Save and Export
Finally, export your enhanced images in the desired format. Ensure you save your edited files in high resolution to maintain quality, especially if you plan to print or display them.
Sample Workflow:
- Import photos into Lightroom.
- Adjust exposure, contrast, and clarity.
- Correct white balance.
- Use HSL sliders to adjust specific colors.
- Fine-tune with selective color adjustments and remove backscatter.
- Apply underwater-specific presets for consistency.
- Export images in high resolution.
By integrating filters with skilled post-processing, you'll be able to bring out the full potential of your underwater shots, ensuring vibrant and captivating images every time.
Additional Photography Tips for Beginners
When you're getting started with underwater photography, there are a few fundamental tips that can make a world of difference in your results. First and foremost, lighting is crucial. Unlike on land, the underwater environment presents unique lighting challenges, so utilize an external flash or strobe to compensate for the diminishing natural light as you dive deeper.
Another essential tip is positioning. Get close to your subject – think inches, not feet. Water reduces sharpness and contrast, so minimizing the distance between your camera and the subject helps to retain those vital details.
Don't forget to explore different angles; shoot from underneath or from the side to create compelling compositions that capture the essence of the underwater world.
For those eager to dive deeper into the technical aspects, resources like "SplashSpiral" offer invaluable guidance on mastering manual mode in underwater photography. This allows you to take full control over settings like ISO, aperture, and shutter speed, enabling you to adapt to varying underwater conditions for optimal shots.
Remember, underwater photography is as much about patience and practice as it is about equipment. So, take your time to experiment, review your shots, and continue learning. Happy diving!
Frequently Asked Questions
Do filters eliminate the need for strobes?
No, filters don't eliminate the need for strobes, but they complement each other.
- Filters: Correct colors that are lost at depth.
- Strobes: Provide the necessary light to illuminate subjects and bring out fine details.
Think of it this way: filters handle color correction, and strobes handle light. Using both together can significantly improve your underwater photos, capturing vibrant and detailed images that pop.
Can I use one filter for all dive conditions?
Not really. Different dive conditions call for different filters to achieve the best results.
- Red Filter: Excellent for restoring warm colors in blue waters at depth.
- Magenta Filter: Performs better in greenish waters.
- Yellow Filter: Great for night dives but not useful in daylight dives.
Assess your dive conditions—such as water color and depth—before choosing your filter. Investing in a set of filters ensures you're prepared for any situation.
Conclusion
Underwater photography is a thrilling adventure, but the challenges of capturing vibrant, true-to-life colors can be daunting. Underwater camera filters offer a straightforward and effective solution to combat color loss, allowing you to reclaim the reds, oranges, and yellows that vanish as you dive deeper. By understanding the types of filters available and choosing the right one for your diving environment, you can significantly enhance the quality of your underwater photos.
Maximizing Your Photos
While filters are essential, they are just one piece of the puzzle. Combining filter use with photo editing software can take your images to new heights, ensuring that your underwater world looks as stunning in photos as it does in real life. Tips to consider:
- Experiment with filters: Try different types of filters to see what works best for your environment.
- Use photo editing software: Enhance your images further with editing software.
Additional Resources
For more tips and techniques on underwater photography, explore resources like:
- How to Photograph Sharks Safely
- Other articles on SplashSpiral.
Dive safe and capture those vivid, life-like colors!