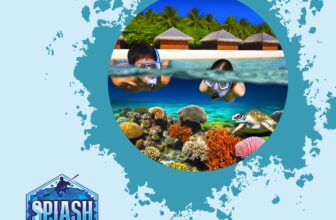
Capturing slow-motion footage underwater can elevate your videos from ordinary to stunning. The challenge lies in understanding the unique aspects of underwater videography, such as lighting, equipment, and techniques. This guide aims to simplify these concepts for beginner divers and aspiring underwater videographers. Let’s dive right in.
Introduction
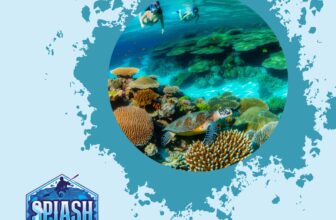
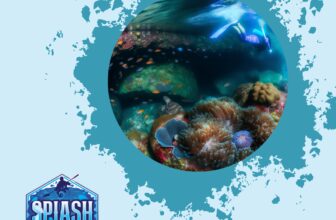
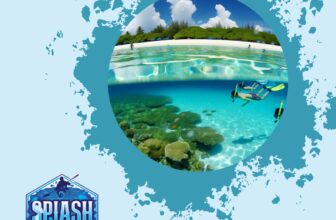
Slow-motion underwater videography combines the captivating beauty of the underwater world with the mesmerizing effect of slowed-down motion, creating a visual feast that’s hard to ignore.
The Appeal of Slow-Motion Underwater Videography
Imagine capturing:
- The graceful glide of a manta ray,
- The delicate sway of sea grasses, or
- The explosive speed of a hunting fish in stunning, slowed detail.
These moments, often missed by the naked eye, become spellbinding when rendered in slow motion.
Challenges of Underwater Videography
However, achieving these results isn't without its challenges. The underwater environment presents unique hurdles such as:
- Light Behavior: Light behaves differently as it passes through water.
- Movement: The water's movement can destabilize your shots.
- Equipment: The camera equipment needed is specialized and often expensive.
Yet, these challenges make mastering the technique even more rewarding.
Key Benefits
Mastering slow-motion underwater videography offers several advantages:
- Highlight Rapid Movements: Ability to capture and analyze rapid movements.
- Dramatic Footage: Create dramatic and engaging footage.
- Novel Perspective: Bring a fresh perspective to your videography portfolio.
With the right equipment, lighting, and techniques, capturing these underwater masterpieces becomes an accessible reality even for beginners.
Let's dive in and simplify the process for you.
Essential Photography Gear for Underwater Videography
Camera Selection: Choosing the right camera is the first step. Look for a camera with high frame rate capabilities, such as 60fps or higher, to achieve silky smooth slow-motion video. Action cameras like the GoPro Hero series or compact mirrorless cameras with 4K and slow-motion options are ideal for beginners due to their ease of use and durability.
Housing Protection: Your camera needs to be in a sturdy, waterproof housing to survive underwater conditions. It's vital to invest in high-quality housing that fits your specific camera model, ensuring it can withstand pressure at various depths. Look for housings with secure seals and easy-to-operate controls to make adjustments underwater without risking leaks.
Strobes and Flashes: Lighting underwater can be tricky. Strobes and flashes help in illuminating your subjects, making colors pop and reducing the blue or green hues typical in underwater environments. Choose strobes that offer adjustable power settings, fast recycle times, and compatibility with your housing and camera. Some popular brands include Sea & Sea and Ikelite.
Lenses and Filters: Using the right lenses and filters can drastically improve your footage quality. Wide-angle lenses allow you to capture more of the underwater landscape and get closer to your subjects, which is crucial in reducing the amount of water between your lens and subject – hence improving clarity. Additionally, filters like red or magenta help in color correction, compensating for the loss of warm colors as you dive deeper.
By arming yourself with the right gear—tailored to the unique needs of underwater filming—you'll be primed to capture stunning slow-motion footage that showcases the beauty and dynamism of the underwater world.
Lighting Underwater: Techniques and Tips
Natural Light Utilization
Natural light is your friend, especially in shallow waters where sunlight can penetrate effectively. Aim to shoot during the middle of the day when the sun is directly overhead for maximum light. This helps in capturing vibrant colors and clear footage. Always remember, though, that the deeper you dive, the less natural light you’ll have, and colors will start to fade—reds and yellows first, followed by greens and blues. To get the most out of natural light, stay close to the surface or use it as a complementary light source. For more details, here’s a useful read on natural light in shallow water photography.
Using Strobes
When natural light isn’t sufficient, strobes come to the rescue. These powerful external flashes help illuminate your subjects, bringing out the true colors and details lost in deeper waters. Use twin strobes for a balanced light spread and reduce shadows. Position them at 45-degree angles to the sides of your camera to avoid backscatter, which are those pesky particles that reflect light and cloud your footage.
Balancing Light Sources
Combining natural and artificial light sources can be tricky but rewarding when done right. The goal is to create a well-lit scene without overexposing certain areas. Start by setting your strobes to a middle power range and adjust based on your ambient light readings. Always review your initial shots and tweak as necessary. Sometimes, you might need to lower your strobe intensity if the natural light is strong, or vice versa in deeper or murkier waters.
Overcoming Challenges
Water distortion and light absorption are two significant hurdles in underwater videography. Light gets absorbed and scattered underwater, making everything appear bluer and darker. To counter this, shoot during optimal lighting conditions and keep your strobes well-maintained. Use wide-angle lenses to minimize distortion and get closer to your subjects, which reduces the amount of water between you and your focal point. Regularly check your footage and be prepared to make quick adjustments underwater to capture the best possible shots.
With these lighting techniques and tips in mind, you’ll be well on your way to creating stunning slow-motion underwater videos that truly captivate your audience. Happy shooting!
Best Camera Settings for Slow-Motion Underwater Video
Resolution and Frame Rate:
For slow-motion underwater videography, you'll want to aim for the highest resolution and frame rate your camera can handle. A common choice is shooting at 1080p with at least 120 frames per second (fps). This allows for smooth slow-motion playback without sacrificing image quality. If your camera supports 4K at a high frame rate, that's even better, as it provides more detail and flexibility in post-production.
White Balance:
Setting the correct white balance is crucial for underwater environments, where colors can shift dramatically with depth. Most beginner-friendly cameras have a custom white balance setting. Use a white or gray card at your intended depth to set the white balance manually. This step ensures your footage will have accurate colors, reducing the amount of color correction needed later.
Focus and Exposure:
Auto-focus can be unreliable underwater due to the varying conditions, so switch to manual focus if your camera allows it. Pre-focus on your subject before starting to record. For exposure, use a combination of manual settings and your camera's histogram. Lower ISOs (100-400) are recommended to minimize noise, and adjust your aperture and shutter speed to maintain a balanced exposure. Keep in mind that a faster shutter speed is necessary to capture crisp slow-motion footage.
Stabilization Tips:
Underwater currents can make it challenging to keep your footage stable. Utilize your camera’s built-in stabilization features if available. Additionally, consider using a handheld stabilizer or rig designed for underwater use. To counteract minor movements, practice steady breathing techniques and use your fins for minimal, controlled adjustments. If needed, use software stabilization in post-production to further smooth out your footage.
By tweaking these camera settings to fit your specific underwater environment, you'll be well on your way to capturing stunning slow-motion videos that captivate your audience. Happy shooting!
Effective Strobe Techniques for Underwater Videography
Getting your strobe techniques right is a game-changer in underwater videography, especially when aiming for captivating slow-motion shots. Here’s a rundown to get you started.
Positioning Techniques
First and foremost, strobe positioning can make or break your underwater footage. Proper placement helps minimize backscatter (those pesky little particles that reflect light) and ensures your subject is well-lit. Start by placing your strobes slightly above and to the sides of the camera housing, angled outward at about 45 degrees. This positioning helps to light your subject from the sides and front while reducing the chance of illuminating particles directly in front of the lens.
For more dynamic shots, you can experiment with moving your strobes closer together or farther apart. Closer strobes provide more concentrated light but beware of hotspots on your subject. Spreading them out can create softer, more even lighting, which is ideal for wide-angle shots.
Power Settings
Strobe power greatly depends on the depth you are shooting at and the distance from your subject. As a rule of thumb, the deeper you go, the more power you’ll need due to increased light absorption by water. Most modern strobes have adjustable power settings; start at medium power and adjust as needed.
It’s crucial to balance the strobe power with ambient light to avoid overexposure. Too much strobe power can wash out your colors and details, rendering your footage flat and lifeless. Practice changing your strobe settings while underwater in response to varying conditions – this flexibility will serve you well in achieving natural-looking lighting.
Syncing Strobes with Camera
Syncing your strobes with your camera ensures that the flash output aligns perfectly with your camera’s shutter. Many underwater cameras and strobes use fiber optic cables or electrical sync cords for this purpose. Make sure your sync cables are securely connected and check for any signs of wear and tear regularly.
Some cameras and strobes offer TTL (Through-The-Lens) metering, which automates the flash output for optimal exposure. While TTL is a convenient feature, don't rely on it entirely. Be ready to switch to manual mode to fine-tune your settings for specific shots, especially when capturing slow-motion footage where timing and precision are critical.
By mastering these effective strobe techniques, you’re well on your way to producing stunning slow-motion underwater videos. The combination of well-placed, properly adjusted strobes with synchronized firing can significantly enhance the quality of your footage, adding depth and detail that will captivate your audience.
Advanced Tips for Professional Results
Pre-Dive Planning
Before you even think about submerging, meticulous planning is your best friend. Know your location, your subjects, and the timing of your dive. Here’s how you can plan effectively:
- Check Tide Charts: Ensure you understand the tide movements to predict currents and water levels.
- Assess Water Clarity: This will help you gauge visibility and plan your shots accordingly.
- Sun Positioning: Predict lighting conditions to optimize natural light usage.
Visualize your shots and map out potential obstacles. This mental exercise cuts down on time wasted underwater and maximizes your shooting efficiency.
Post-Processing
Capturing great footage is only half the battle. Post-processing can elevate your clips from good to extraordinary. Here's a step-by-step approach:
- Color Tweaks: Adjust colors to bring out the natural beauty of underwater scenes.
- Boost Contrast: Enhance details by increasing contrast.
- Smooth Jitters: Use stabilization features to smooth out any shaky footage.
Slow-motion, by nature, accentuates every detail, so adjustments to light and shadow can make a significant difference. Aim for natural enhancement rather than dramatic alteration.
Maintaining Your Gear
Your gear is your lifeline, and keeping it in pristine condition ensures consistent results. Follow these maintenance tips:
- Rinse Equipment: Use fresh water immediately after each dive to prevent salt damage.
- Check Camera Housing: Regularly inspect for seals and cracks to avoid leaks.
- Clean Lenses and Strobes: Remove any smudges or grime to ensure clear shots.
Well-maintained gear won’t just perform better; it’ll also last longer, saving you money in the long run.
Conclusion
By integrating these advanced tips into your routine—planned shots, thoughtful edits, and reliable gear—you’ll see a noticeable improvement in your underwater slow-motion footage. These strategies will set you well on the path to producing professional-quality videos.
Common Mistakes and How to Avoid Them
Overexposure
One of the most common errors in underwater videography is overexposure. Since water tends to scatter light differently than air, what seems like a perfectly lit shot on land can quickly wash out underwater, especially when using artificial lighting.
Tips for Avoiding Overexposure:
- Use Your Histogram: Rely on your histogram rather than the camera's display screen.
- Adjust Exposure Settings: Stop down your exposure settings to prevent over-brightness.
- Post-Processing: Use post-processing sparingly to bring back details instead of trying to fix an overly bright clip later.
Motion Blur
Motion blur can ruin an otherwise stunning slow-motion video. Underwater currents and the slight movement of marine life can make it challenging to get tack-sharp imagery.
Tips for Avoiding Motion Blur:
- Higher Shutter Speed: Maintain a higher shutter speed—preferably double your frame rate (e.g., 1/120 if shooting at 60 frames per second).
- Stabilize Your Camera: Invest in a quality underwater tripod or a set of handle grips to stabilize your rig.
Ignoring Environmental Factors
Water conditions can change rapidly, affecting visibility, lighting, and even buoyancy. Beginners often underestimate the impact of these factors, resulting in footage that doesn’t do justice to the underwater world.
Tips for Dealing with Environmental Factors:
- Check Conditions: Always check tide schedules, water visibility, and weather conditions before you dive.
- Adapt Your Shooting Plan: In murky waters, get closer to your subject and use stronger artificial lighting. On clear, sunny days, stick to natural light and avoid unnecessary artificial sources to achieve a more natural look.
Final Tips for Improving Underwater Videography
By keeping these common pitfalls in mind and adjusting your techniques as needed, you can significantly improve the quality of your underwater slow-motion videos.
Additional Tips:
- Practice in Controlled Environments: Start by practicing in controlled environments like pools before heading into open water.
- Adapt to Dynamics: Always be prepared to adapt to the underwater world’s ever-changing dynamics.
Happy diving!
Final Thoughts
As you embark on your journey into slow-motion underwater videography, remember the key points: selecting the right gear, mastering lighting techniques, optimizing your camera settings, and practicing effective strobe use. These foundational steps will set you on the path to capturing captivating underwater moments with clarity and impact.
Don't be afraid to experiment and make mistakes; it's an essential part of learning. Each dive offers a new opportunity to refine your skills and develop your unique style. The underwater world is a mesmerizing arena brimming with action that, when slowed down, reveals intricate details and mesmerizing beauty.
Finally, dive deeper into resources that can further elevate your craft. Websites like Splash Spiral offer comprehensive guides on diving techniques, while sections on photography gear can help you stay updated on the latest equipment.
By integrating these practices and continually learning, you'll be well on your way to mastering this art form and creating spellbinding slow-motion underwater videos that captivate and inspire your audience. Happy diving!