Underwater landscape photography lets you explore a whole new world beneath the waves. For beginners and aspirants, mastering the art of capturing wide-angle underwater shots might seem like a daunting task. But with the right tips and gear, you can bring the submerged scenery to life. Let's dive into the essentials!
Introduction
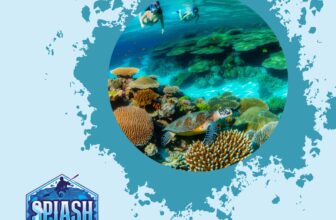
Underwater landscape photography is all about capturing the underwater world in all its vast and surreal glory. It involves using specialized equipment and techniques to photograph coral reefs, sunken ships, underwater caves, and the vast array of marine life in their natural environment.
The appeal of underwater landscape photography lies in its ability to transport viewers to an alien world—a world filled with vibrant colors, bizarre creatures, and dynamic light play that changes with the depth and water conditions. For beginners, this genre of photography offers a unique blend of adventure and artistic expression, where every dive opens up new possibilities to capture unseen beauty. Whether you’re fascinated by the tranquility of the deep sea or the bustling life of coral reefs, underwater landscape photography provides a fulfilling way to explore and document the wonders beneath the waves.
Gear Essentials for Underwater Landscape Photography
Cameras & Housings
Starting your journey into underwater photography requires the right camera and housing. Key factors to consider include:
-
Camera Requirements:
- Robust build
- Good manual control
- Low-light performance
Recommended Models:
- Sony a7 series
- Canon EOS R series
-
Housing Requirements:
- Specifically designed for your camera model
- Rated for the intended dive depths
- Reliable brands: Aquatica, Nauticam
- Easy access to all camera controls
- Proper seals to prevent leaks
Wide-Angle Lenses
Wide-angle lenses are essential for capturing expansive underwater scenes and minimizing water distortion. Consider the following:
-
Focal Lengths:
- 10-20mm for APS-C systems
- 16-35mm for full-frame systems
-
Lens Ports:
- Ensure your housing can support the lens port needed for wide-angle lenses
These lenses allow you to include diverse scenery and marine life in your frame.
Underwater Flash and Strobes
Lighting is crucial for underwater photography since natural light diminishes quickly with depth. Optimal equipment and positioning include:
-
Recommended Gear:
- Inon Z-330 strobe
- Sea & Sea YS-D3 strobe
-
Positioning Tips:
- Avoid backscatter by positioning strobes slightly outward
- Adjust the distance from the camera
- Experiment to find the optimal lighting balance
Using underwater flashes and strobes effectively will highlight your subjects vividly, enhancing the quality of your underwater photos.
Preparing for the Dive
Pre-Dive Equipment Check
Before plunging into the depths, it's crucial to ensure your equipment is in top shape. A pre-dive equipment check can make all the difference between a successful dive and a frustrating one. Here's a straightforward checklist to follow:
- Camera and Housing Seal: Make sure the camera's underwater housing is properly sealed and free from any cracks or defects. A small leak can ruin your gear and your dive.
- Battery and Storage: Verify that your camera batteries are fully charged and you have ample storage space. Low power or full memory cards can cut your dive short.
- Lens and O-rings: Inspect lenses for any smudges or scratches and clean them if necessary. Make sure O-rings are well-lubricated and seated correctly to prevent water ingress.
- Strobes and Lights: Check that your strobes and underwater lights are functioning properly. Ensure you have spare batteries and backup bulbs, just in case.
- Dive Computer: Ensure your dive computer is working and has fresh batteries. Monitoring your dive parameters is essential for safety and timing your shots.
- Buoyancy Control Device (BCD) and Regulator: Double-check that your BCD and regulator are in excellent working condition. Good buoyancy control helps you maintain stability while shooting.
Dive Planning
Once your equipment is ready, the next step is dive planning. Proper planning can maximize your chances of capturing stunning underwater landscapes. Here's how to get ready:
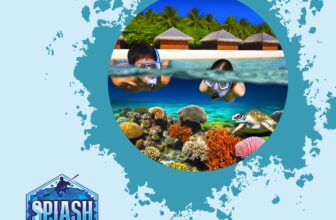
- Location Research: Select dive sites known for their underwater scenery. Coral reefs, kelp forests, and shipwrecks are excellent starting points. Online forums and local dive shops can provide valuable insights.
- Optimal Lighting: Plan your dive times to coincide with optimal lighting conditions. Early morning or late afternoon dives often offer the best light, reducing harsh shadows and creating softer, more appealing images.
- Tide and Current Considerations: Check tide charts and current forecasts. Calm waters provide better visibility, while strong currents can make it difficult to compose your shots.
- Dive Buddy: Always dive with a buddy, not just for safety but also for assistance with gear and capturing dynamic shots. A buddy can help model for scale or hold a light to illuminate your subject.
- Shot List: Having a rough shot list can focus your efforts and ensure you don't miss key opportunities. Note specific scenes or subjects you aim to capture and prioritize them during your dive.
- Safety First: Familiarize yourself with the dive site's emergency procedures and have a well-thought-out plan for safe ascents. Prioritize your oxygen supply and stay within your limits to avoid decompression sickness.
By methodically preparing your gear and planning your dive, you'll set yourself up for a successful underwater photography session. Remember, the more you dive and shoot, the more intuitive these steps will become. Happy diving!
Lighting Underwater
Lighting is a crucial aspect of underwater landscape photography. Water tends to absorb light, particularly the red wavelengths, causing distant subjects to appear a washed-out blue-green. Here’s how to manage your lighting to create vivid, eye-catching photos.
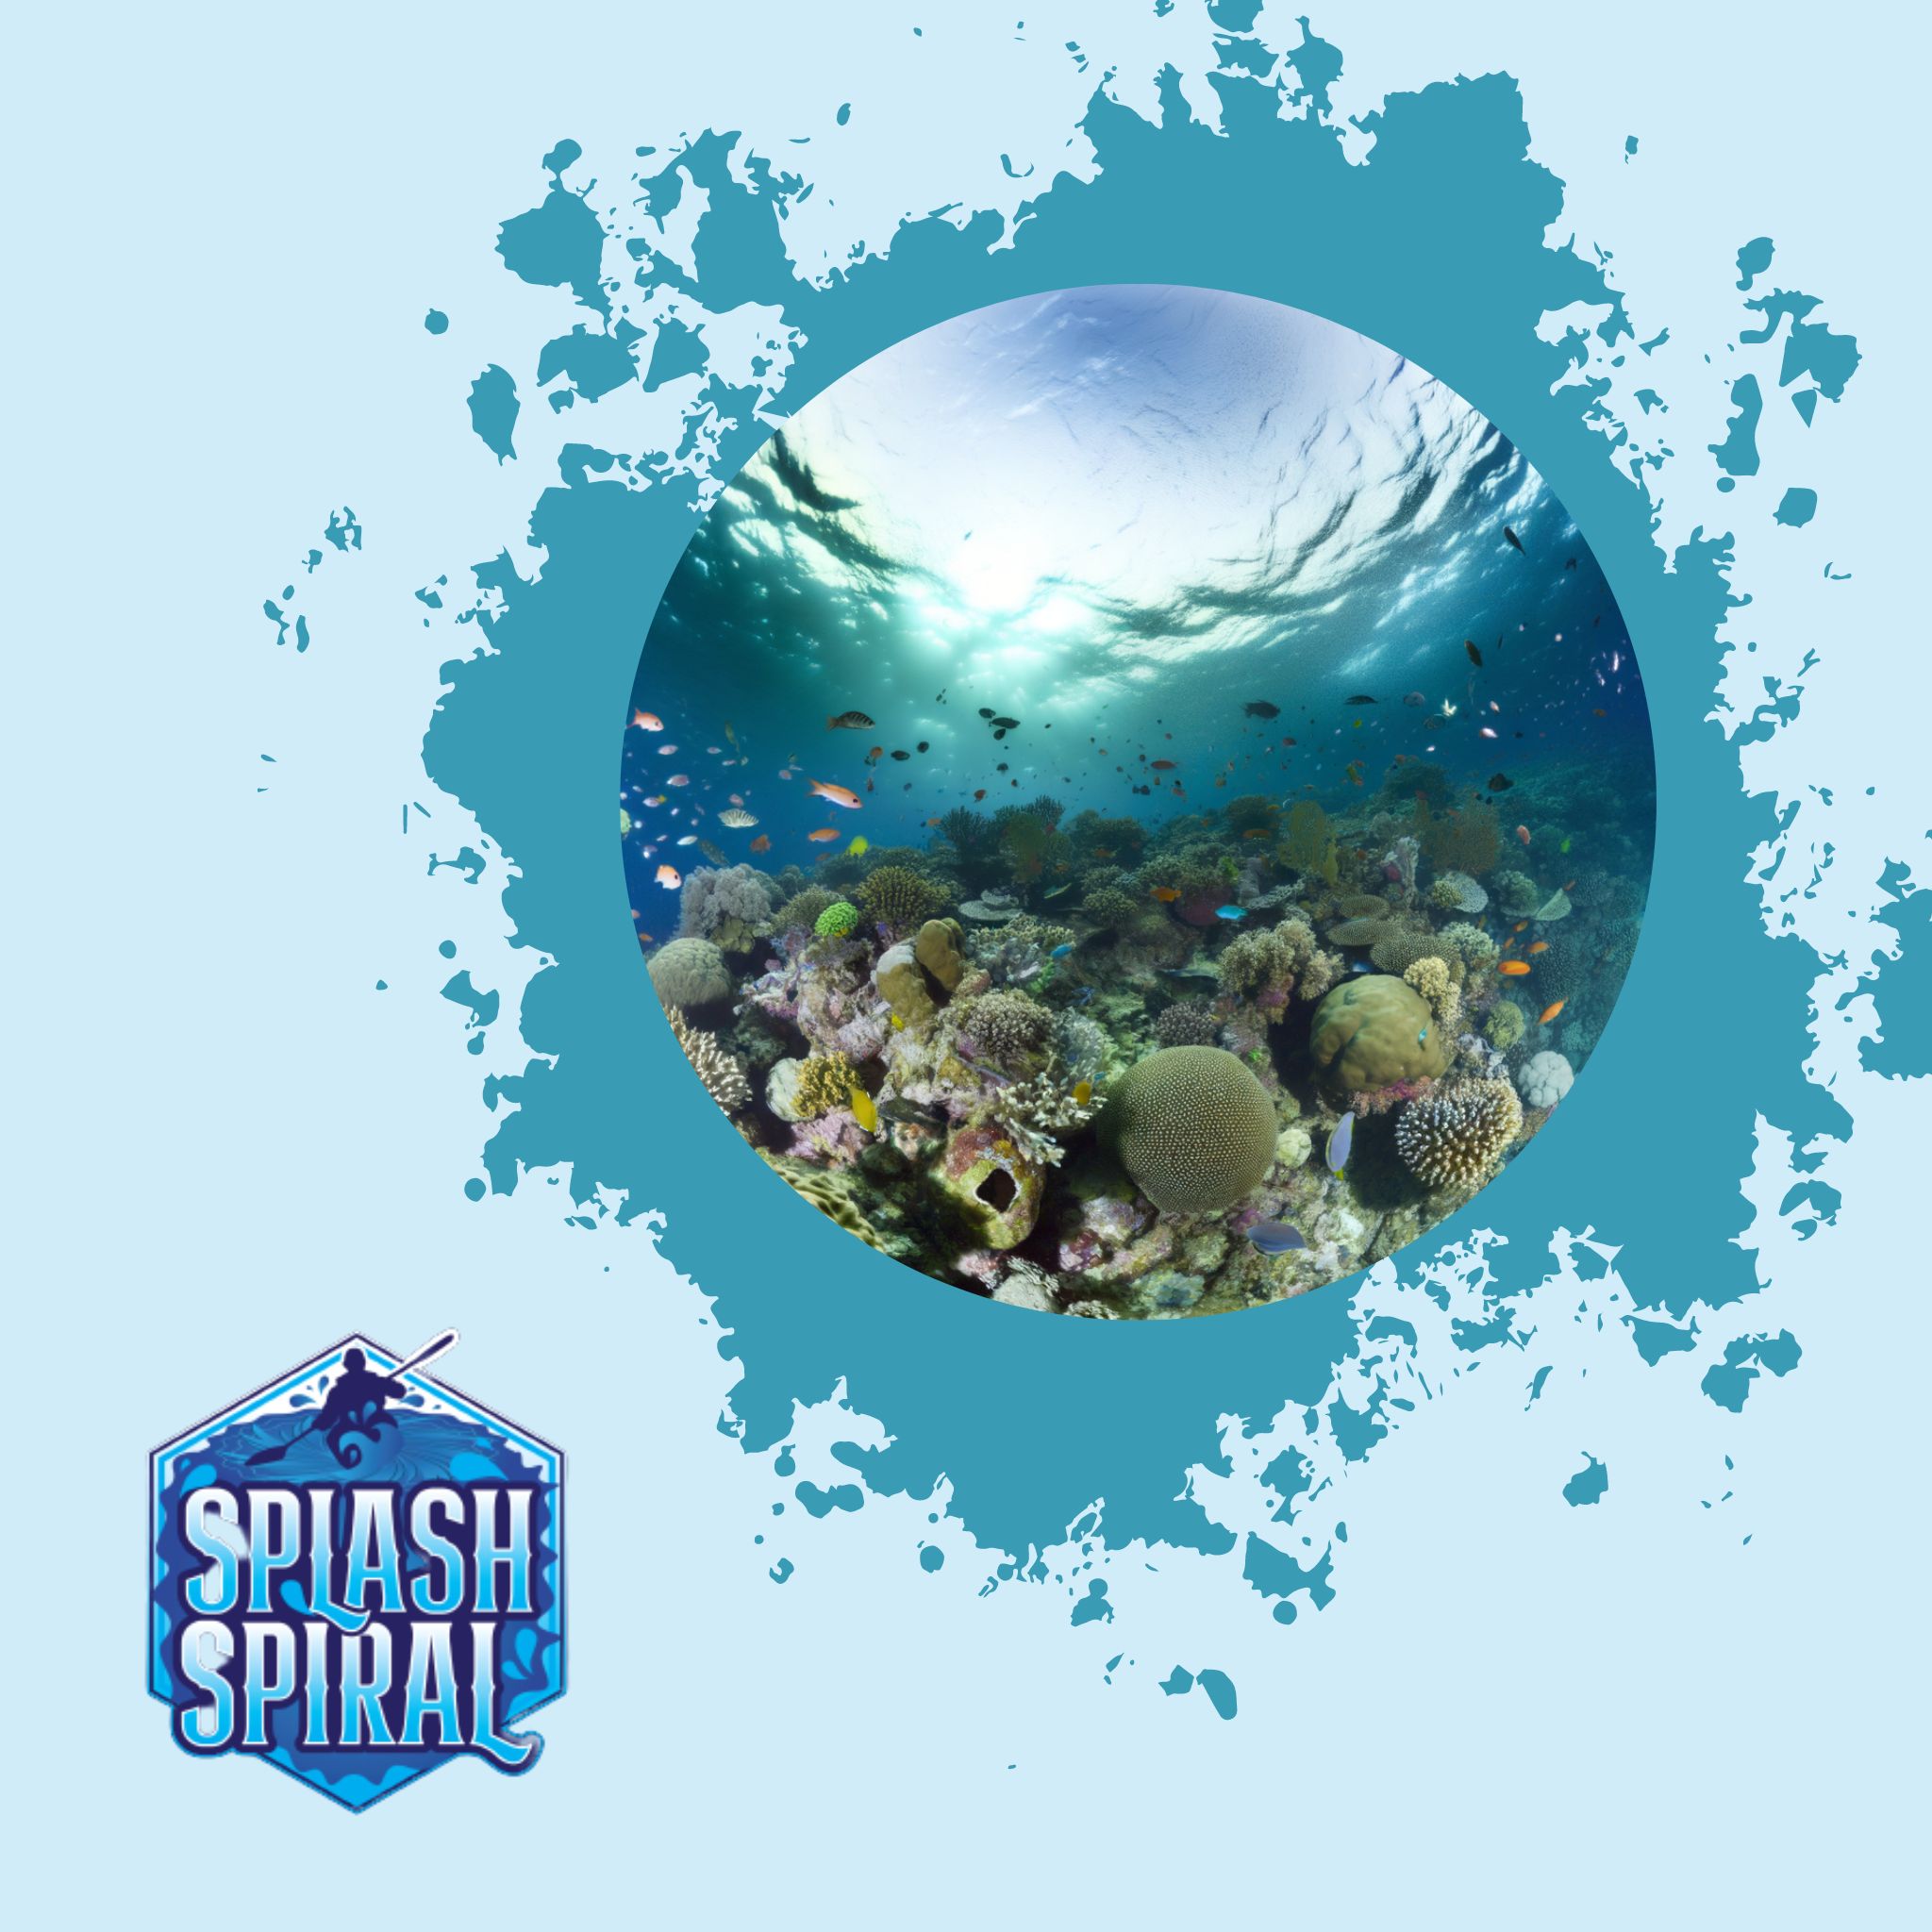
Natural Light
Using natural light effectively can dramatically enhance your underwater shots. Dive during the middle of the day when the sun is high and its rays penetrate deeper. Opt for locations with clear water to maximize light availability. You should position yourself so that the sun is behind you, illuminating your subject directly. However, remember that the deeper you go, the less light you’ll have, so stay in relatively shallow waters to make the most of natural light.
Using Artificial Light
Artificial lighting, through flashes and strobes, is essential for adding color and detail to your shots, especially when natural light is insufficient. Here are a few quick tips:
- Close Proximity: Keep your strobes as close to the lens as possible to reduce the scattering effects of particles in the water, also known as backscatter.
- Angles: Position the strobes at a slight outward angle to illuminate the subject without bouncing light directly back into the lens.
- Power Settings: Adjust strobe power based on the distance to your subject; closer subjects require less power, while distant subjects need more.
Master these basics and you'll be well on your way to capturing stunning underwater landscapes. For more in-depth lighting techniques, explore Lighting Underwater.
Wide-Angle Photography Techniques
Composition
One key aspect of wide-angle underwater photography is nailing the composition. Start by following the "rule of thirds," where you mentally divide the frame into nine equal parts and position your subject along these lines or their intersections. But don't be afraid to break the rules for the sake of creativity. Look for natural lines such as coral formations or the ocean floor to lead the viewer's eye through the image. Remember, the wide-angle lens is your tool to capture expansive scenes, so make sure every element in your frame serves a purpose.
Staying Close
When it comes to underwater photography, the water itself can act as a barrier, reducing the clarity and contrast of your image. The solution? Stay close to your subject. The less water between your lens and your subject, the sharper and more vibrant your image will be. If you're photographing marine life, respect their space but get as close as ethically possible. For landscapes, consider focusing on prominent features like rock formations or corals that can act as compelling foreground elements.
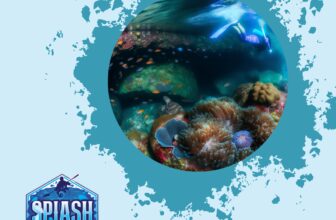
Angles & Perspectives
Wide-angle lenses give you the flexibility to experiment with different angles and perspectives. Try shooting upwards towards the sun to capture dramatic light rays filtering through the water. By getting low and shooting up, you can make subjects like divers or marine creatures appear more imposing and dynamic. Conversely, shooting down from above can help to frame expansive reef systems or schools of fish. Don't be afraid to tilt your camera and experiment; sometimes unconventional angles can lead to striking, memorable images.
That's it for now. Stick with these basics and work your way up. You'll find that with each dive, your confidence and skill in capturing wide-angle underwater landscapes will grow. Happy snapping!
Essential Strobe Techniques
When it comes to underwater wide-angle photography, the way you use your strobes can make or break your shot. Here are some essential strobe techniques to help you capture the best possible images.
Positioning
One of the most critical factors in underwater photography is the positioning of your strobes. Proper strobe placement can reduce backscatter — the tiny particles in the water that reflect the light back into the lens, causing unwanted specks in your images.
- Angle Your Strobes Outward: Instead of pointing your strobes directly at your subject, try angling them slightly outward. This helps illuminate the scene from the sides, minimizing backscatter and producing more even lighting.
- Distance Matters: Keep your strobes as close to the camera as possible to ensure the light covers a broader area. However, avoid getting too close to avoid hotspots.
- Height and Depth: Experiment with the vertical positioning of your strobes. Having one strobe slightly higher than the other can add depth and dimension to your photos.
Balancing Light
Achieving a perfect balance between artificial strobe light and ambient light is key to natural-looking underwater photos.
- Manual Settings: Get comfortable with using manual settings on your camera and strobes. Automatic settings often fail to adequately balance the two light sources underwater.
- Adjust Strobe Power: Begin with your strobes set to medium power. Adjust upwards or downwards depending on the exposure readings and the natural light available.
- Mind the Background: Make sure the background isn't too dark or too bright. A good balance will help your subject stand out without looking out of place. Gradually increase or decrease the power of the strobes to achieve this effect.
Practical Tips
- Pre-dive Test Shots: Before you start your dive, take a few test shots at different settings. This helps you tweak settings to suit the conditions you'll be diving in.
- Use Diffusers: These can soften the light from your strobes, making them more natural and less harsh on your subjects.
- Experiment and Adapt: Each dive site offers unique lighting challenges. Don’t be afraid to experiment and adjust your strobe positions and power throughout your dive.
These strobe techniques will help you manage light underwater effectively, ensuring your wide-angle shots are both striking and free of technical flaws. For more in-depth techniques, be sure to check out our internal link here: Strobe Techniques.
By mastering strobe positioning and balancing light, you'll be well on your way to capturing stunning underwater landscapes that pop with color and clarity.
Post-Processing Tips
So, you've got your underwater shots. Now what? Here’s a rundown of post-processing tips to make your photos pop.
Software Recommendations
First off, you need the right tools.
- Adobe Lightroom and Photoshop: Go-to choices for many underwater photographers. They offer robust editing options to enhance your raw images.
- GIMP and Darktable: Free alternatives if you're just starting out. These tools will help you tweak the fine details and bring out the best in your photos.
Color Correction
Underwater images often suffer from a blue or green cast because water absorbs red and yellow light quickly. For color correction:
- Adjust the White Balance: Most editing software has a 'Temp' and 'Tint' slider to help get this right.
- Boost Reds and Reduce Blues: This helps make your photos look more natural.
- Use the 'Selective Color' Tool: Fine-tune specific color ranges to make your images more vibrant.
Sharpening & Noise Reduction
Water adds a layer of complexity, making your images softer and potentially noisier.
Sharpening
- Focus on the Subject: Sharpen the subject rather than the whole image.
- Lightroom's 'Detail' Panel: Allows precision sharpening.
- 'Masking' Slider: Avoid sharpening the water; concentrate the effect where it’s needed most.
Noise Reduction
- Lightroom's 'Noise Reduction' Tool: Helps smooth out grainy areas.
- Use Sparingly: Too much noise reduction can make your image look plasticky.
Remember, post-processing shouldn't overshadow the original photograph but enhance it. With these basics, you’re set to make your underwater landscapes look even more captivating. Now, get back to your editing bay and let those photos shine!
Professional Tips from Underwater Photographers
Consistency: Practice Makes Perfect
Just like any other skill, mastering underwater photography requires consistency. Keep practicing, and don't get discouraged by initial failures. The more you shoot, the better your instinct for framing, lighting, and timing will get. Set small goals, like perfecting one technique at a time, and progressively build your expertise.
Learning from Mistakes: Avoid These Common Pitfalls
Every newbie makes mistakes—what matters is learning from them. Here are some common errors beginners face and how to sidestep them:
- Not Getting Close Enough: Water absorbs light and colors, making subjects appear less vibrant the farther they are from the lens. Get as close to your subject as possible.
- Ignoring the Background: A messy or cluttered background can diminish the subject's appeal. Be mindful of your composition and background elements.
- Improper Strobe Use: Incorrect strobe positioning can result in uneven lighting or backscatter. Practice aiming your strobes at various angles to mitigate these issues.
For more professional insights, check out our Diving Tips.
By consistently practicing and learning from your missteps, you'll steadily enhance your underwater photography skills. Remember, every great photographer started at the beginning—so dive in and start shooting!
Expanding Your Knowledge
Join Communities
One of the best ways to grow as an underwater photographer is by joining communities. These can be anything from local diving clubs to online forums dedicated to underwater photography. Engaging with a community offers you access to valuable tips, honest feedback, and a supportive network. Here are a few places to start:
- Facebook Groups: Type "underwater photography" in the search bar on Facebook. Join groups where members share their experiences and photos, and participate in discussions.
- Online Forums: Websites like Wetpixel and ScubaBoard have sections specifically for underwater photography. These forums are packed with threads on every topic imaginable, from beginner tips to advanced techniques.
Continuous Learning
In the realm of underwater photography, there's always something new to learn. Whether it's a new shooting technique or post-processing trick, continuous learning is key to improving your skills.
- YouTube Channels: Follow channels that specialize in underwater photography. Many offer tutorials, gear reviews, and dive vlogs that can provide you with practical advice.
- Podcasts: For those who prefer listening while commuting or relaxing, check out some underwater photography podcasts. They often feature interviews with professional photographers who share their experiences and tips. Here's a handy link to get you started: Underwater Photography Podcasts.
- Workshops and Courses: Sometimes, the best way to learn is through structured lessons. Look for workshops and courses offered either locally or online. They can range from single-day classes to week-long expeditions that combine diving and photography tuition.
By immersing yourself in the underwater photography community and committing to continuous learning, you'll be well on your way to mastering the art. Happy diving!
Conclusion
Underwater landscape photography is a thrilling way to capture the beauty of the world beneath the sea. Throughout this guide, we’ve highlighted essential gear, prep steps, lighting strategies, and wide-angle techniques that can help you get started. Remember, it all comes down to experimenting and practicing to hone your skills.
Start by ensuring your camera and housing are suited for the depths you plan to explore. Don’t underestimate the importance of wide-angle lenses and strobes in bringing out the best in your underwater scenes. Meticulous pre-dive checks will save you from unwanted surprises below, and proper dive planning will allow you to harness optimal lighting and locations.
In terms of technique, focus on composition, stay close to your subjects, and experiment with different angles and perspectives. Dive into post-processing to fine-tune your images, correcting colors, sharpening details, and reducing noise to make your photos stand out.
Engage with the underwater photography community, practice consistently, and learn from your mistakes. This journey requires patience and dedication, but each dive will bring you closer to capturing the perfect shot.
With these tips in hand, you’re more than ready to start your adventure into the mesmerizing world of underwater landscapes. Happy diving and shooting!